| WOOLGATHERERS - FLAX PROCESSING | |||||||
|
| FLAX RETTING | We are often asked about retting flax straw. Once the crop has been harvested and rippled, there are two ways to ret the straw so that the shives are properly rotted and pop away from the fiber when put into the flax break. One is to soak the straw in water that is constantly renewsed (kiddy wading pool in summer) the other is dew retting where the flax straw is laid out on the field and turned over frequently, allowing the nightly dew to decompose the shives. Judging when the straw is properly retted is a bit like putting a toothpick into a cake to see if it is done. With water retting, every day after the first 48 hours, a few straws are pulled out, dried and checked for readiness. With dew retting, every few days is sufficient as the process is slower. Then the straw is ready, the shives will literally snap and fly away from the fibers. If the shives do not snap, or if they stick to the fiber, the retting will take a bit longer. Of course, it is also possible to have the straw over retted or damaged, which is not at all desirable. We now have 3 videos showing how to test the straw during the retting process. 1. Nicely water retted flax. This batch went through breaking and scutching with lovely results. 2. Not quite finished dew retted flax. This flax needs a little more finishing. If put in the break at this point, the fiber may be damaged by the amount of force needed to break away the shives. 3. Ruined flax - overwintered to see what happens. This flax was planted late and not ripe until late fall. Left under the snow of a Wisconsin winter, it became over retted with weak fiber. There is some poor quality short fiber to be had, but not to be recommended. |
|
FLAX PROCESSING
| Spring was late this year. The flax from FLAXCAM is still in the shed in the racing bed. A planned visit to a family wedding and Convergence in Vancouver will give us a late start getting it retted - not really a problem, because once the crop is harvested and dried, it can sit for some time before further steps are necessary. If the straw is fully retted and dried this summer, it can be stored until next year or even longer before breaking and hackling.
The photos below were taken in June, 2002 while my sister and her children, Louis and Anna Lieb of Colorado were visiting. Group processing such as this was quite common - together it went faster and everyone pitched in to get the fibers ready to spin.
The flax straw is from Viking seed, purchased at Convergence 1994 in Minneapolis, and planted in our raised bed garden in 1996. Retted in 1997, we have been processing in bits and pieces on nice summer days since.
Surely in times past, working with flax from previous harvests would have been common - in the summer, before harvest, the old dry straw would have been readily available. When sown regularly, this guaranteed material to work with continuously.
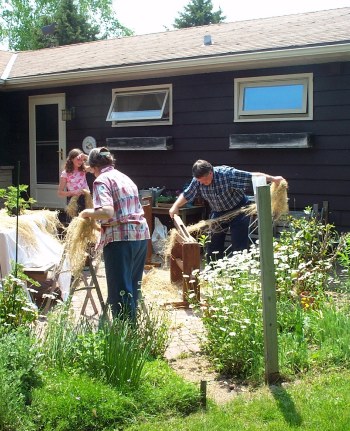 Here we are, Anna, my husband Hans and I working together breaking and hackling - and messing up the patio nicely.
The weather was perfect - not too humid and warm, but not terribly hot.
Here in Wisconsin, the summer humidity makes breaking, scutching and hackling a challenge - as the straw should be as dry as possible.
Louis working the flax break.
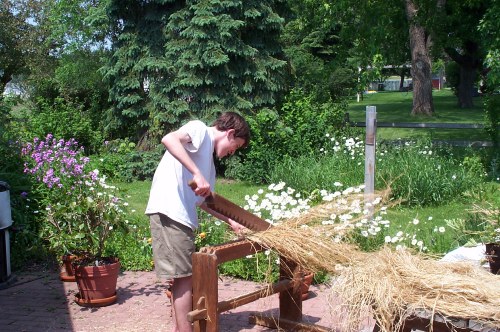 Anna working the break and Hans scutching in the backgrouns.
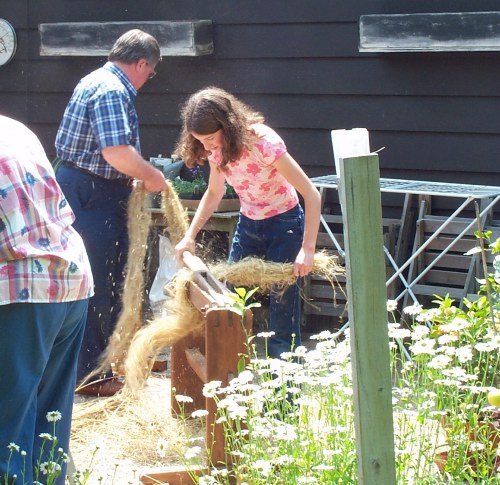 Hans scutching.
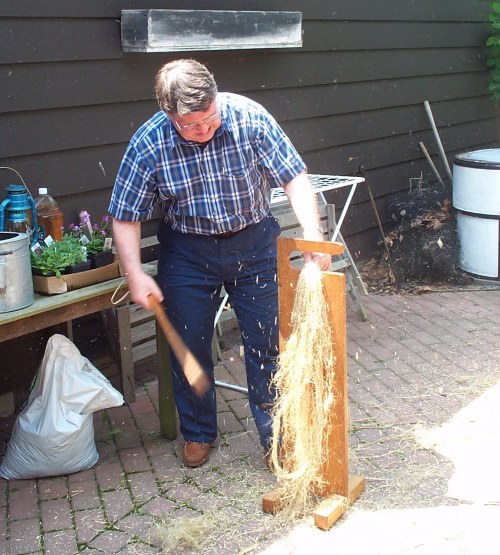 Sara hackling.
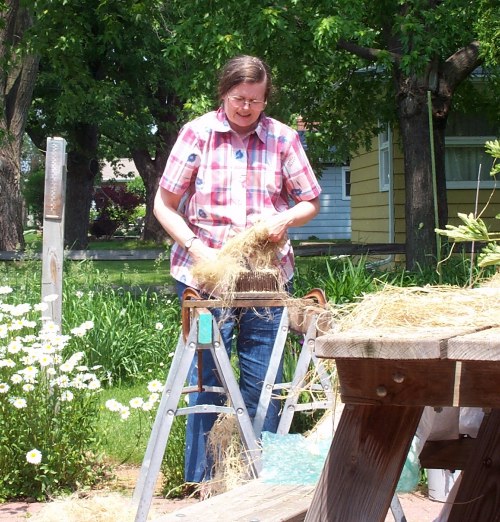 From all of this, we have a bag with a few ounces of fiber that looks as if it will spin into nice yarn. And everybody had fun playing with it.
|
Tools Used to Process the Hackled Flax into Linen Thread and Woven Fabric
|
FLAX PROCESSING TOOLS
 SPINNING WHEEL AND SCUTCHING BOARD SHOWN BELOW
|
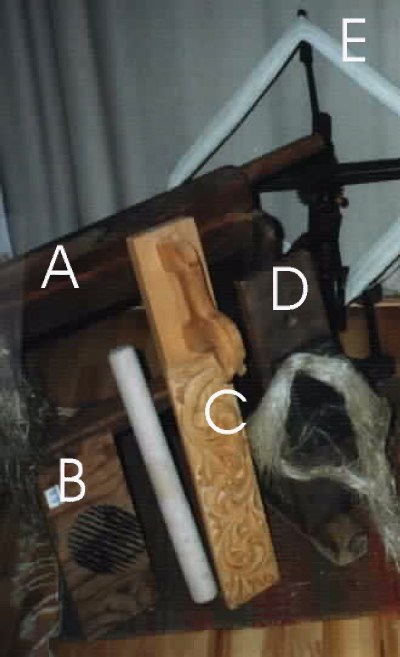
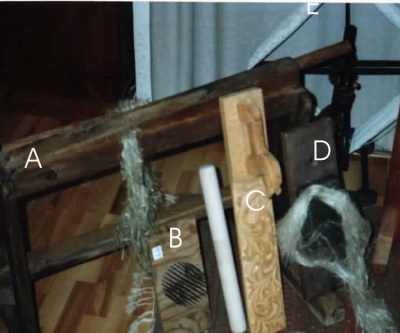
Turning flax into linen thread and then into cloth requires not only time and back breaking labor, it requires a set of tools peculiar to the process. Pictured here is what is needed to transform the retted, dried flax straw into linen thread.
A.
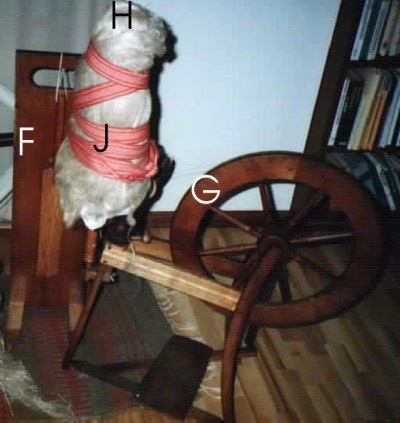
The FLAX BREAK. This clumsy wooden device chops away at the straw. When the straw has been properly retted and dried (this step should not be done in humid weather without predrying the straw in a warm place) the chaff literally breaks away from the fiber. A sample of broken flax is hanging from the break. Of course, not ALL chaff is removed. The next step involves F - the scutching board and knife. There the hardwood knife beats more of the chaff away from the fibers.
B. and D.
These grizzly beds of nails are HACKLES. The broken and scutched flax is then drawn through these nails. B. is a medium hackle, made by my husband of sharpened nails put through plywood backing. D. is an antique fine hackle purchased on eBay. A sample of hackled flax is shown in the teeth of the fine hackle. In this step, there is quite a loss of fiber as the short and broken fibers are pulled out of the bundle of shining long flax. These shorter fibers are later combed and hackled again to produce the TOW linen - thread spun from the shorter, and mostly coarser fibers resulting as a sort of leftover of the pre-sinning process. The long, combed LINE fibers are bundled into a "strick" to await dressing the pinning wheel.
C.
This is a mangel board, used to press finished woven goods. It belongs to the set of tools needed to make linens for the household. My husband made this board at a carving class and the roller is actually a French rolling pin. (More about the mangel board is found under Care of Linens).
G.
Spinning flax into linen thread is done with a spinning wheel (or spindle). I prefer to work with a dressed distaff - H and J - to keep the fibers prepared for pulling down to spin. This arrangement is based on a conscious "tangling" of the fibers so that there is a continuous feed until the last dregs have been spun. The distaff is bound up with a handwoven linen Inkle band (J).
Linen is spun wet - that is the spinner places a container with water nearby and dips her fingers in the water frequently to help smooth the spun yarn.
A sample skein of handspun linen is pictured with other Handspun Yarns.
|

